How to get started with your Reseller account?
Written by Ghjuvan Simeoni on
You want to start selling applications? You've come to the right place. The GoodBarber platform allows you to save time and money while creating unlimited apps! With this program, you can create as many apps as you want without needing to know how to code. There are 2 different Resellers price plans : Classic, where you can create only Classic apps , and Classic+Shopping, where you can create Classic and eCommerce apps.
1/ Dashboard
When you create your free trial account , you'll be taken directly to the Dashboard. It's from here that you'll be able to manage all your clients' apps.
How to create apps from the Dashboard?
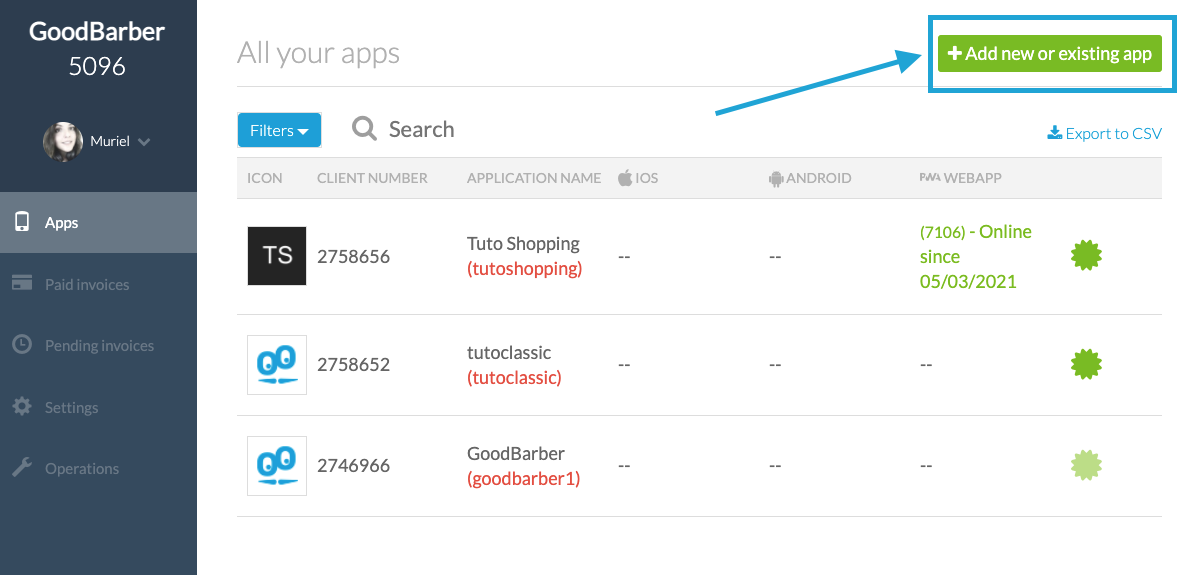
To create new projects (apps), it's very simple. Log in your Dashboard and click on the "Add new or existing app" button located on the top right of the dashboard.
To create new projects (apps), it's very simple. Log in your Dashboard and click on the "Add new or existing app" button located on the top right of the dashboard.
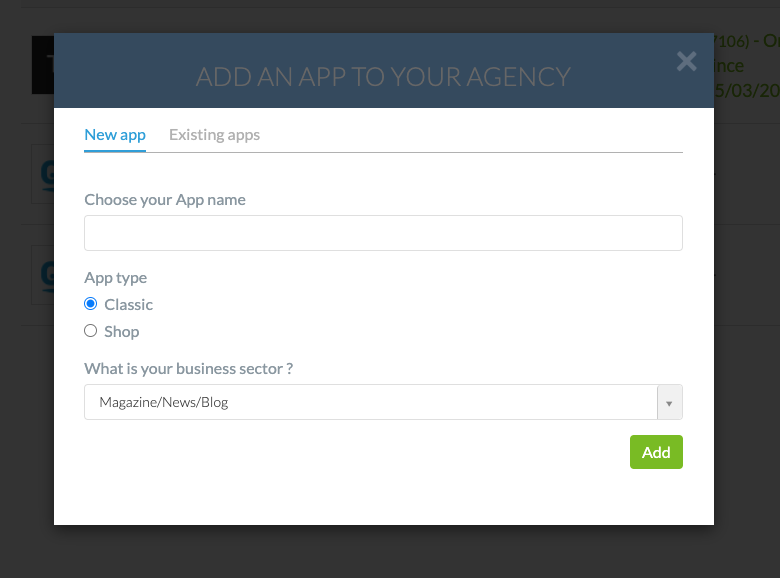
Then choose the name of your project, the type (Classic or Shopping), the category of the app and validate. Don't forget, with a Reseller subscription, you can create as many apps as you want. Your new app is now created and can be found in the list of apps on your Dashboard.
2/ Classic Apps
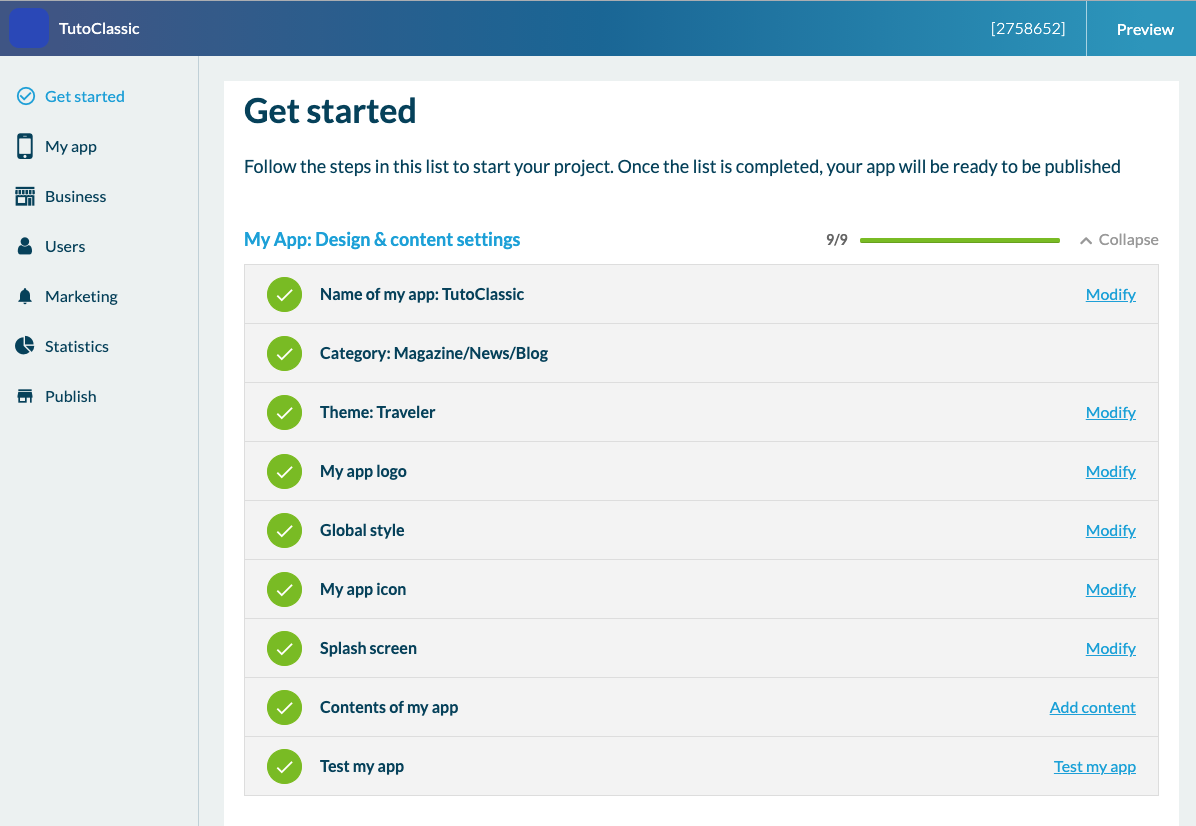
Now that you know how to create an app from your Dashboard, we'll show you how a Classic App works. From the Dashboard, by clicking on the name of the project, you'll land in the back-office of the app, which is the only interface on which you will build your first app. When you get to the back office you will see the Get Started menu which will allow you to follow the app's creation progress.
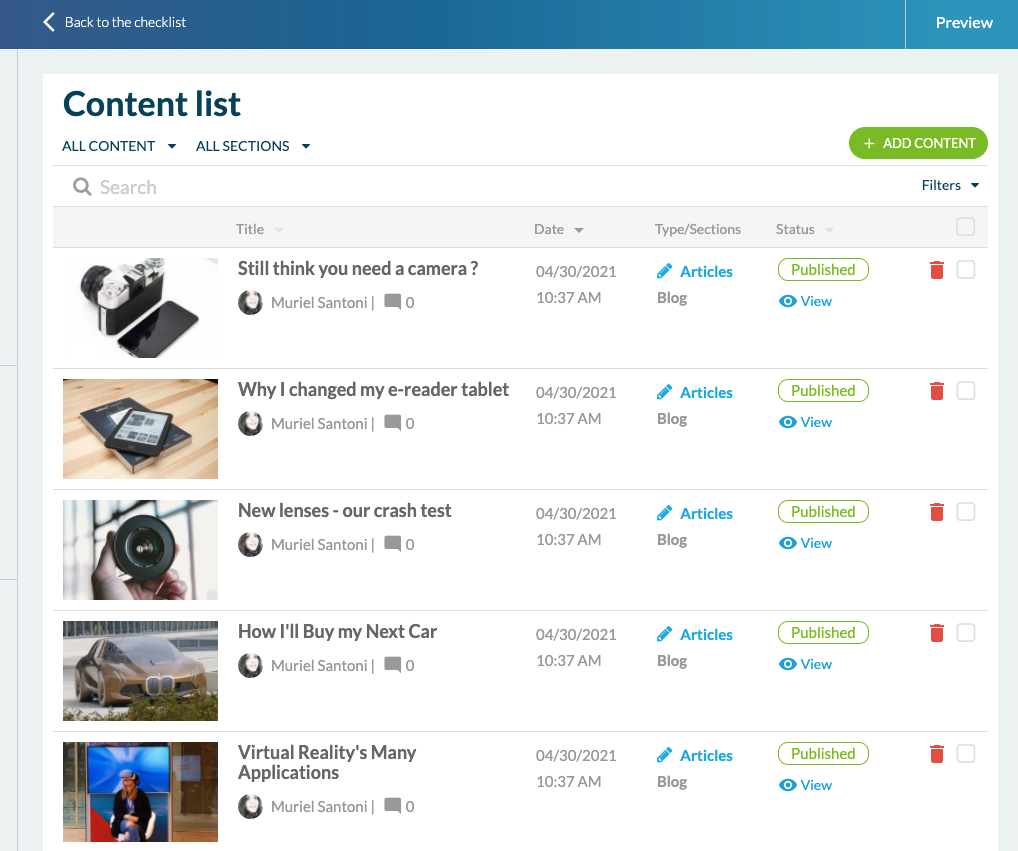
Content management
To start, go to "My App" > "Content". This is where you can add content of any type. In "Content list" you can view and organize all the content present in the app.
To start, go to "My App" > "Content". This is where you can add content of any type. In "Content list" you can view and organize all the content present in the app.
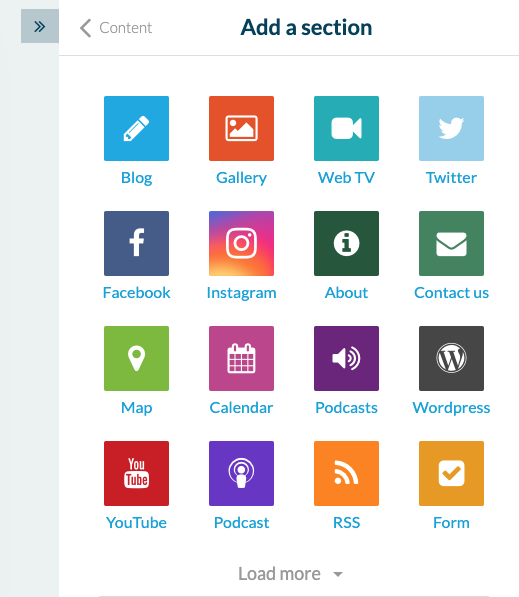
Then in the "Sections" menu, you'll be able to add all the sections available in the app, such as a calendar, a map, a form or an HTML container. These sections will be found in the navigation menu.
2 sections can help you organize the navigation menu: The "Menu" section and the "Click-To" section. In the "Menu" section, you can insert several different sections (Blog section, Form section...). This section is ideal to organize the content of the app because you can group several sections or categories under the same title.
The "Click-To" section allows you to send users to a specific link. It can be an internal link to the app (to specific content) or an external link (to a website or another app, for example).
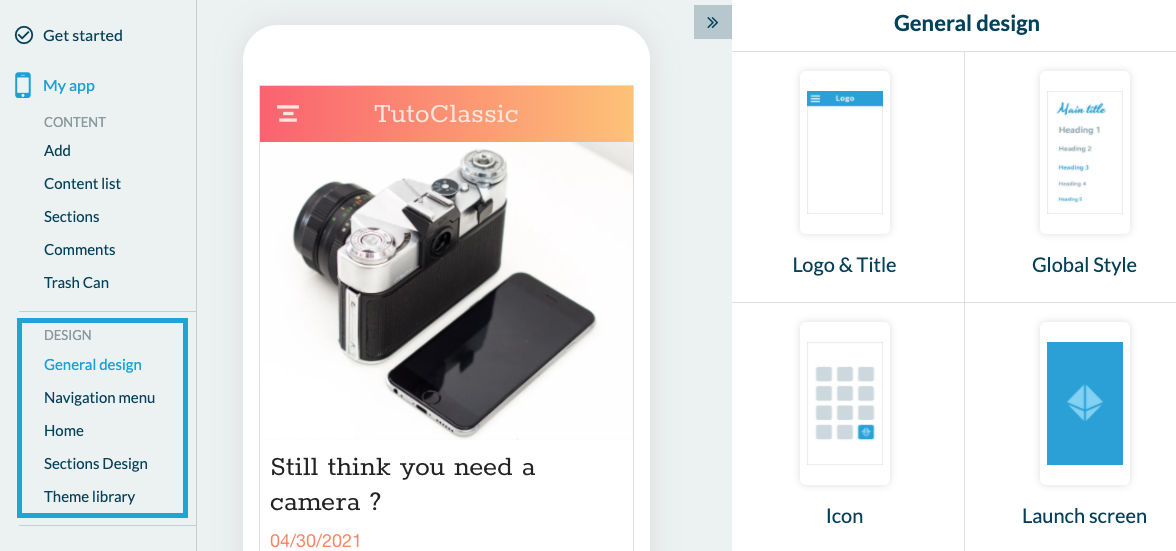
Design
You can then continue in the "Design" section, with the general design. Here you can customize the Header, the "Global Style" with pre-loaded color palettes, the app icon, the launch screen and the background. Continuing in the design, you'll also be able to customize the navigation menu. We offer you 5 basic designs + the possibility to create a design from scratch or not to display a menu at all. In this case, only the "Home" will allow the user to navigate in the app. Speaking of "Home", this is the next menu. It is on this page that you will highlight the key content of the application. Here, it is about adding Widgets. There are 7 possibilities: Retrieve existing content in the app, add a link, external or internal, insert advertising, links to social networks, newsletter subscription, a separator, for design purposes, or HTML code those who know how to do...
Previewing the app
Once you have made progress in the configuration of the app, you'll surely want to preview it. The easiest way to do this is to publish the web version (PWA) of the app in "Publish PWA". It takes a few minutes and you'll be able to access it by following the link provided from a computer, a tablet, or a smartphone. By default, the URL is in this form: https://[appname].goodbarber.com/. If you add a domain name to your Dashboard, the mention "Goodbarber" will be replaced by your domain name. So your client won't see that the app was created with GoodBarber.
To test the native version, which will be sent to the stores, you can download the My GoodBarber app.
Publication on the Stores
Once you're ready to publish on the stores, simply follow the process in the 'publish' menu of each channel (Android and iOS). For information, for Android (Google Play) you can publish the apps by yourself, or you can rely on GoodBarber's service which is a paying service (50€ for 10 credits: 1 publication + 9 updates).
For the native iOS version of the app, our "Review" team takes care of the publication. The team reviews your client's app to maximize the chances of it being accepted by Apple. This mandatory review costs 9,90€ per app (1 review per month is offered for "Classic+Shopping" accounts).
3/ Shopping Apps
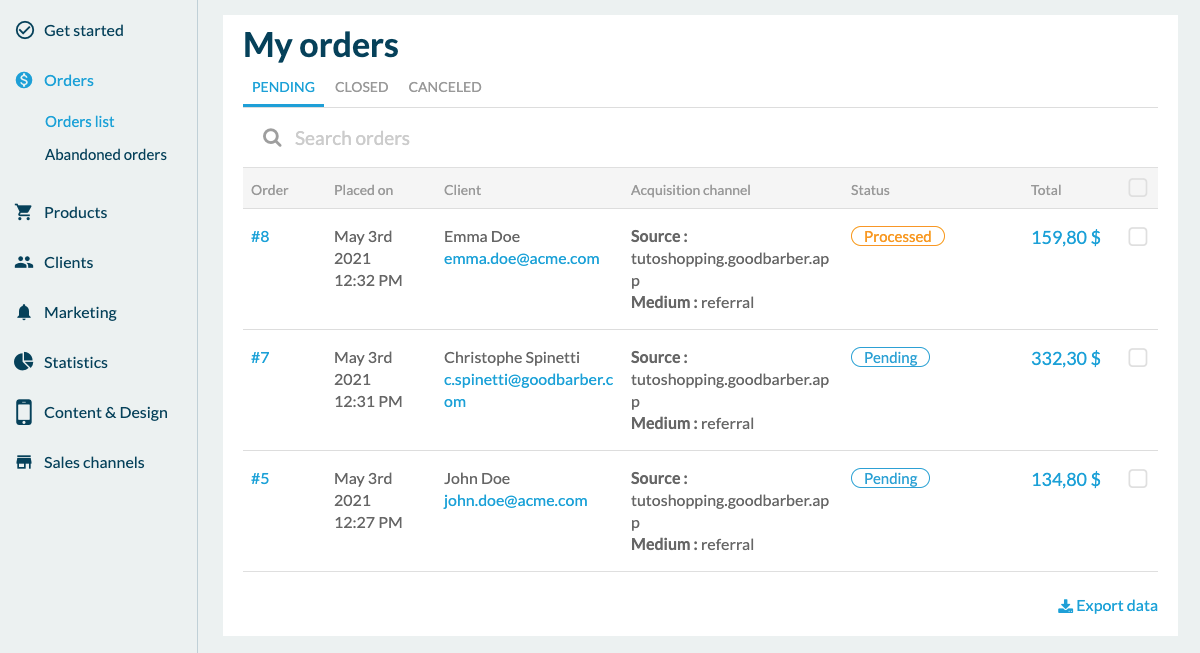
To create a Shopping app, you have to follow the same process as for the Classic app from the Dashboard, but choosing "Shopping" of course. The Get started menu works like on the Classic.
List of orders
Let's start with the "Orders" menu where all the orders of the final clients are managed. There are 4 order statuses. "Pending" and "Processed" are listed under the "Open" tab. Then the "Delivered" status switches the order to the "Closed" tab. As soon as an order is placed in "closed" it's counted in the sales statistics. Finally, the status "cancelled" allows you to list cancelled orders. If you enter the details of an order, you'll see all the information useful for the processing of this order such as the items ordered, the type of payment, the client's address or the acquisition channel.
Products
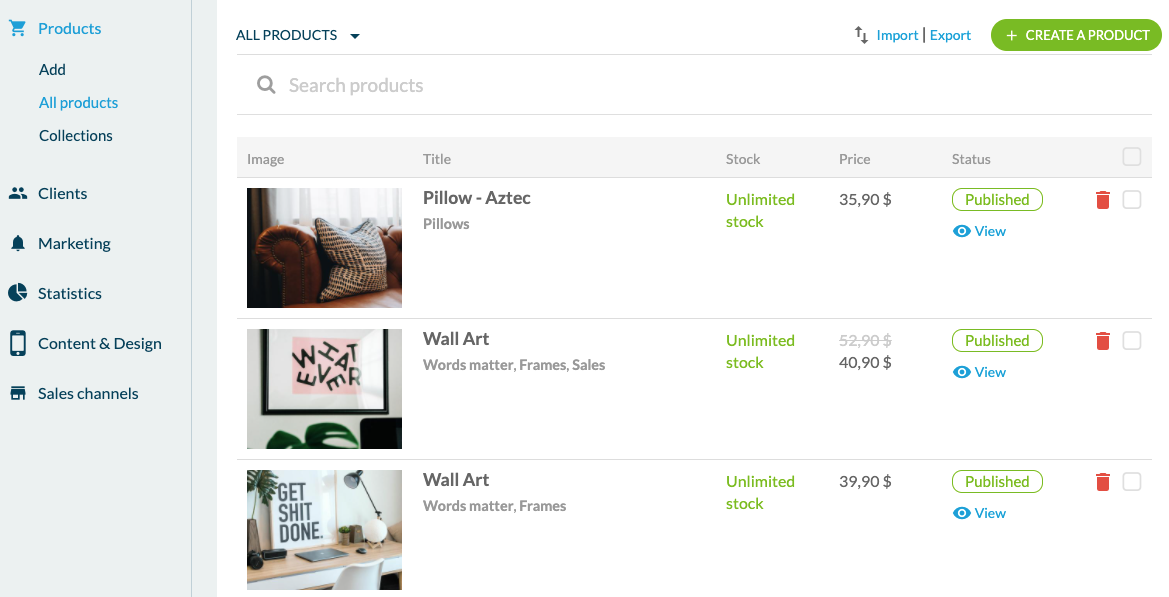
Then in "Products", you can of course add a product . Here you can configure the title and subtitle of the product, add up to 9 photos, text, and variants. You'll also have the possibility to add a crossed-out price, the stock status, and add a reference. Variants are useful to list different sizes, colors, or packaging. For example, if you build an app selling T-Shirts you'll be able to list all sizes and different colors of the T-shirt. No need to create 1 product per color for example. Once the product is created, you'll find it in "all products". Here you'll see all your products and you can arrange them in different collections. Speaking of collections, the following menu allows you to create and configure collections. Collections are groups of products that you'll use to organize the navigation menu and the Home Page.
Then in "Products", you can of course add a product . Here you can configure the title and subtitle of the product, add up to 9 photos, text, and variants. You'll also have the possibility to add a crossed-out price, the stock status, and add a reference. Variants are useful to list different sizes, colors, or packaging. For example, if you build an app selling T-Shirts you'll be able to list all sizes and different colors of the T-shirt. No need to create 1 product per color for example. Once the product is created, you'll find it in "all products". Here you'll see all your products and you can arrange them in different collections. Speaking of collections, the following menu allows you to create and configure collections. Collections are groups of products that you'll use to organize the navigation menu and the Home Page.
Clients and Leads
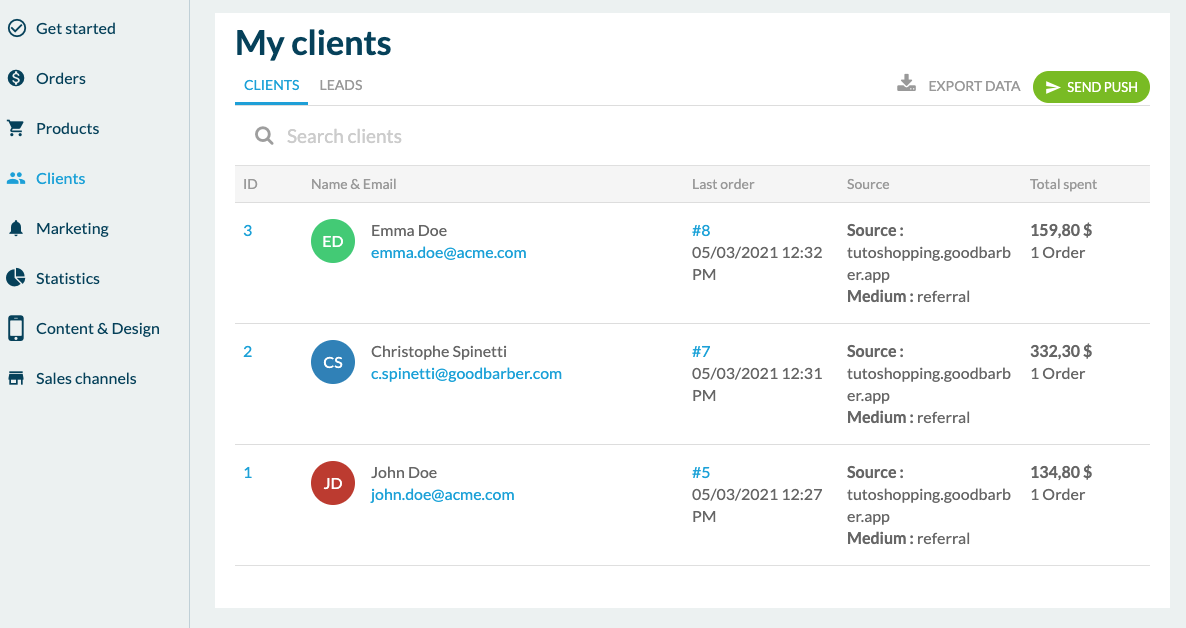
Continuing in the menu, you'll see the client management options. Here you'll first find the list of clients in the app. These are people who have registered and placed at least one order in the app. The client record includes all useful information such as contact details, order history, or total amount spent. The " Leads " tab lists the people who have registered to the app but have never purchased anything.
Continuing in the menu, you'll see the client management options. Here you'll first find the list of clients in the app. These are people who have registered and placed at least one order in the app. The client record includes all useful information such as contact details, order history, or total amount spent. The " Leads " tab lists the people who have registered to the app but have never purchased anything.
Specific options
The "Content & design" and "Sales channels" menus work the same way as for the Classic apps.
The "Content & design" and "Sales channels" menus work the same way as for the Classic apps.
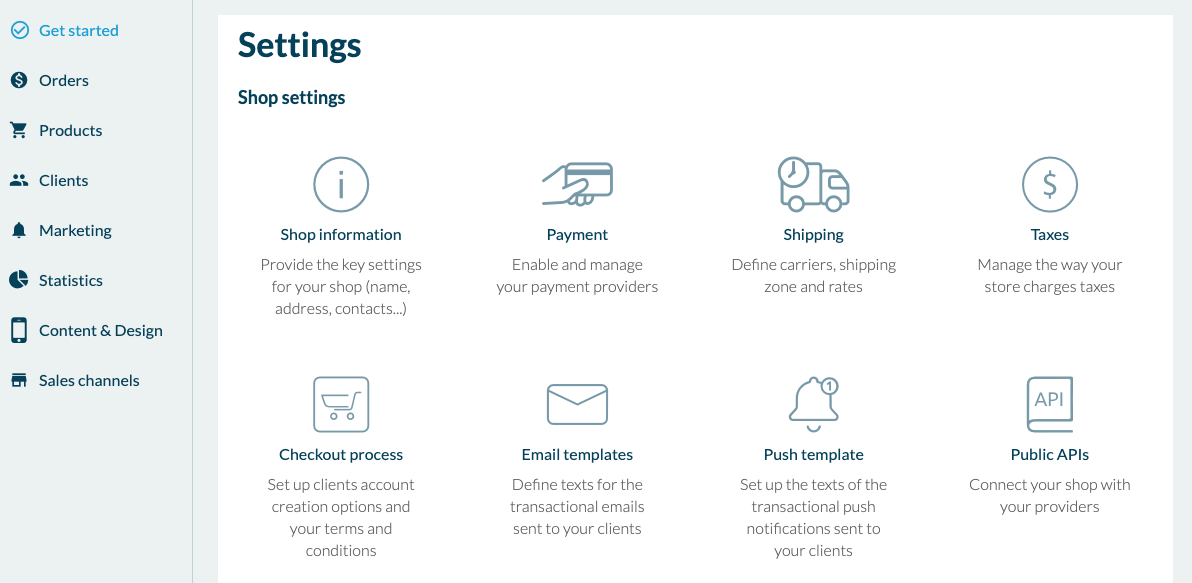
But what is also interesting to know in the shopping apps are the payment methods . Here you can choose between "Stripe" which includes the most common bank cards in the world (Visa, Amex, Mastercard..) but also Apple Pay, Paypal, and MercadoPago (only for Latin American countries). There is also the possibility of "offline payment " (Cash, check, etc..). You'll be able to offer your client several payment methods to invoice their services or products. For your information, GoodBarber does not take any commission on sales but payment gateways do.
We'll now see the delivery methods. With GoodBarber, you can set up delivery zones and shipping fees that will apply based on weight, geographical area, or price paid by the client. You can also propose to your client to do the delivery themselves by choosing the free add-on "local delivery ". Or finally, you can choose the click and collect in this case, the final client will come directly to collect their order in the store.
Here is a summary of what you can do with GoodBarber. If you need more help, different resources are available in the back-office of each app, by clicking on "Support" at the bottom right. You'll have access to online help and a ticketing system to ask your questions to the support team. All the information you need to be successful in selling apps is available on our Resources Page .
Still don't have a Reseller account?
Follow this link to start testing for free:
https://www.goodbarber.com/create/reseller/
https://www.goodbarber.com/create/reseller/
 Design